> ## Documentation Index
> Fetch the complete documentation index at: https://docs.mantlebio.com/llms.txt
> Use this file to discover all available pages before exploring further.
# GitHub

 Mantle simplifies code reusability and supports developer best practices by allowing you to connect directly to your public and private GitHub repositories.
* Manage GitHub connections seamlessly in Mantle.
* Access connected GitHub repos directly within Mantle Notebooks.
* Add custom Nextflow pipelines from connected GitHub repos.[\*](#footnote1)
## How to connect a GitHub repository to Mantle
The Mantle GitHub integration allows you to connect any of your private repositories so that you can access the contents in Mantle.
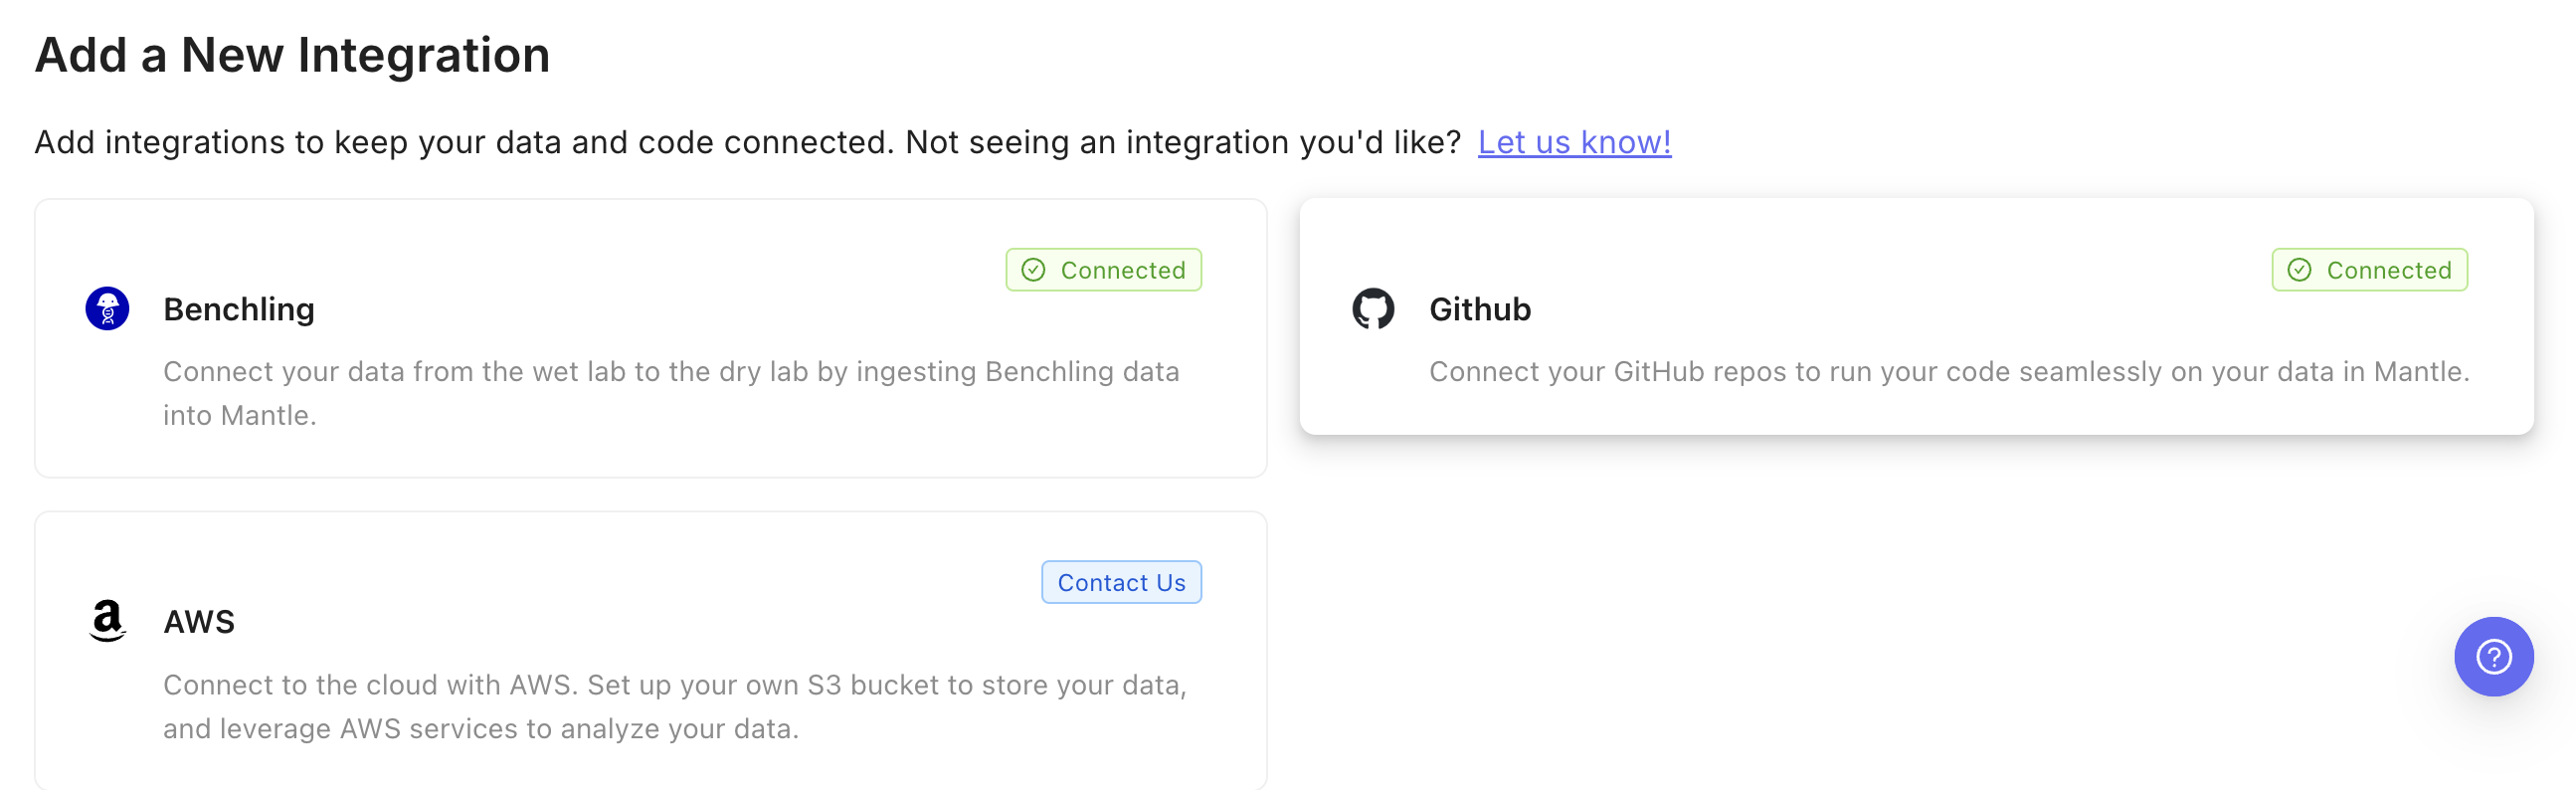
* Navigate to the [Integrations](https://app.mantlebio.com/integrations) tab within Mantle and scroll down to the **Add a New Integration** section.
* Click on the GitHub card.
Mantle simplifies code reusability and supports developer best practices by allowing you to connect directly to your public and private GitHub repositories.
* Manage GitHub connections seamlessly in Mantle.
* Access connected GitHub repos directly within Mantle Notebooks.
* Add custom Nextflow pipelines from connected GitHub repos.[\*](#footnote1)
## How to connect a GitHub repository to Mantle
The Mantle GitHub integration allows you to connect any of your private repositories so that you can access the contents in Mantle.
* Navigate to the [Integrations](https://app.mantlebio.com/integrations) tab within Mantle and scroll down to the **Add a New Integration** section.
* Click on the GitHub card.
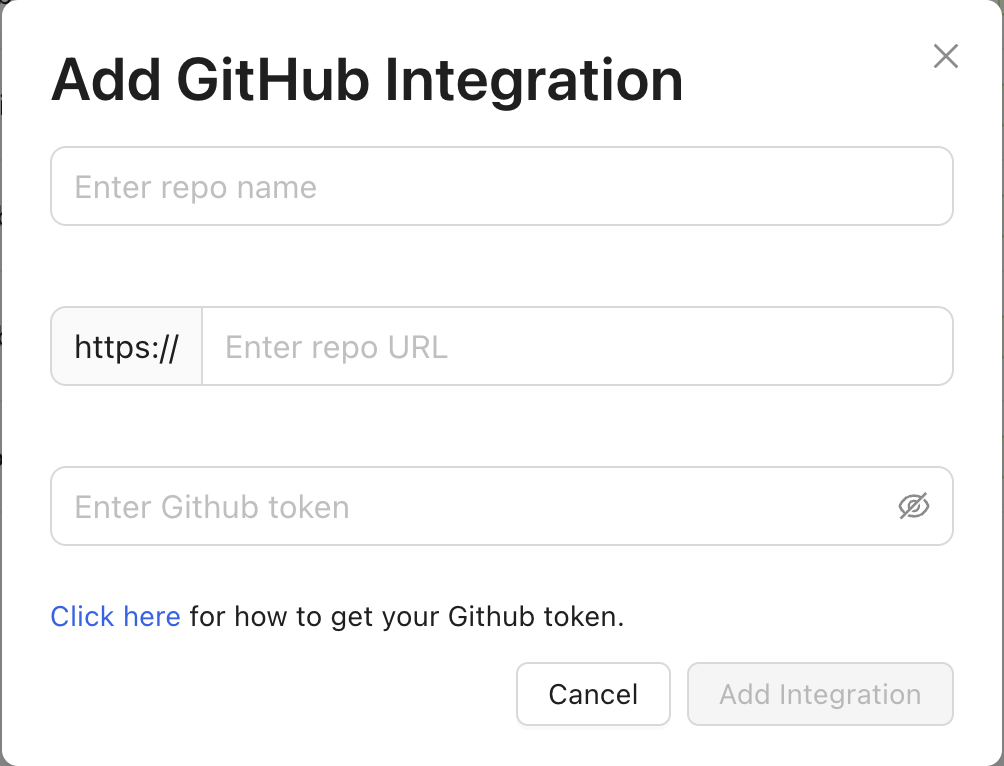
 * Enter the name you want to use to refer to the repo in Mantle.
* Enter the repo URL in the following format: `github.com//`.
* Enter a GitHub token that enables read access to the repo. See [below](#how-to-generate-a-github-token) for instructions on how to generate this token.
* Enter the name you want to use to refer to the repo in Mantle.
* Enter the repo URL in the following format: `github.com//`.
* Enter a GitHub token that enables read access to the repo. See [below](#how-to-generate-a-github-token) for instructions on how to generate this token.
 ### How to generate a GitHub token
To give Mantle read access to your GitHub repo, you will provide a GitHub token.
Go to the [**Fine-grained tokens**](https://github.com/settings/tokens?type=beta) settings in GitHub.
### How to generate a GitHub token
To give Mantle read access to your GitHub repo, you will provide a GitHub token.
Go to the [**Fine-grained tokens**](https://github.com/settings/tokens?type=beta) settings in GitHub.
 * Give the token a name.
* Select the resource owner of the repo you are connecting to Mantle.
* Set the expiration date. After this date, Mantle will no longer have access to your repo and you will need to generate a new token.
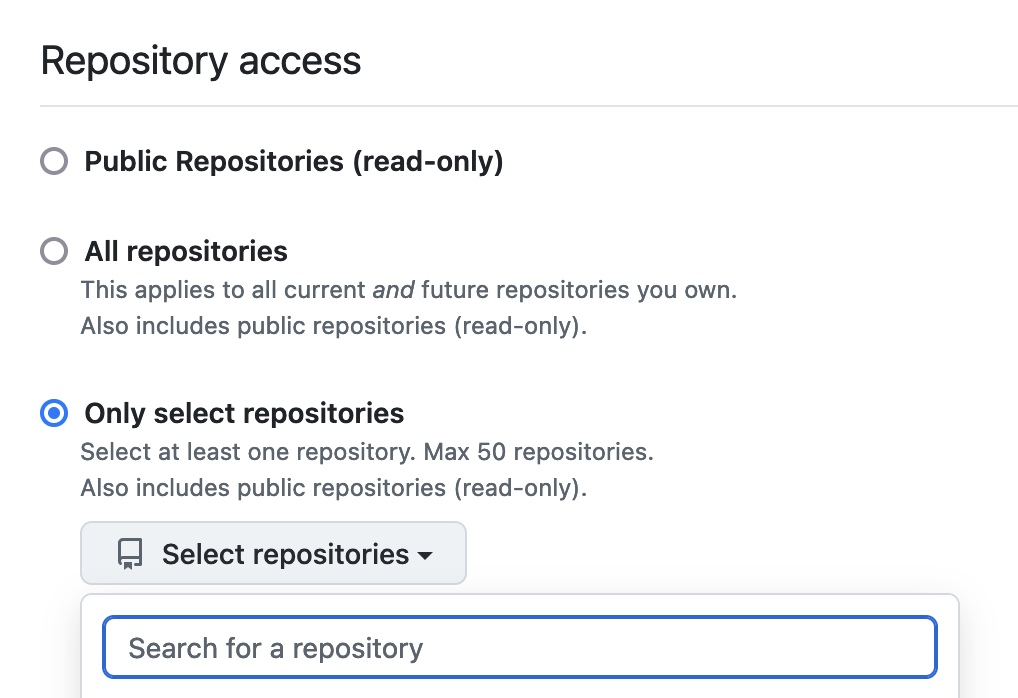
* Select the repos you want the token to grant access to. We recommend creating one token per repo.
* Give the token a name.
* Select the resource owner of the repo you are connecting to Mantle.
* Set the expiration date. After this date, Mantle will no longer have access to your repo and you will need to generate a new token.
* Select the repos you want the token to grant access to. We recommend creating one token per repo.
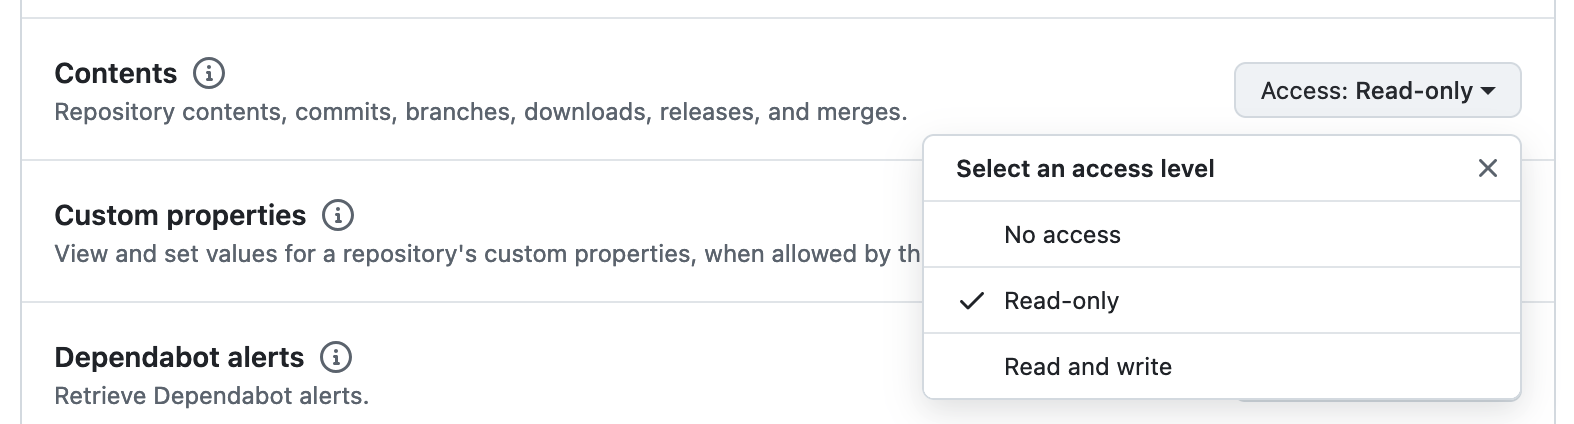
 * Scroll down to the Permissions section and expand the Repository permissions section.
* Scroll down to the Contents section and set the Access level to Read-only.
* Scroll down to the Permissions section and expand the Repository permissions section.
* Scroll down to the Contents section and set the Access level to Read-only.
 * Scroll all the way to the bottom of the page and click the Generate token button.
 * Paste the token into [the form](#enter_token) for adding a new GitHub connection in Mantle.
The token will only be shown to you this time. You can store the token in a secure location, such as a password manager.
## How to access a connected GitHub repo in a Mantle Notebook
All of your connected GitHub repos are available from within Mantle Notebooks.
When you start a Mantle Notebook, the connected repos will be cloned into your Notebook's environment.
Repos are stored within the `github_repos` directory in the root directory of all Notebooks. You can access the files within each repo at `github_repos/`.
[\*](#footnote1_back)*Adding custom pipelines is available to professional and enterprise users. Contact us to learn more.*
* Paste the token into [the form](#enter_token) for adding a new GitHub connection in Mantle.
The token will only be shown to you this time. You can store the token in a secure location, such as a password manager.
## How to access a connected GitHub repo in a Mantle Notebook
All of your connected GitHub repos are available from within Mantle Notebooks.
When you start a Mantle Notebook, the connected repos will be cloned into your Notebook's environment.
Repos are stored within the `github_repos` directory in the root directory of all Notebooks. You can access the files within each repo at `github_repos/`.
[\*](#footnote1_back)*Adding custom pipelines is available to professional and enterprise users. Contact us to learn more.*